How to Build Your Own Electric Guitar from Scratch
Understanding the Basics of Electric Guitars
Before diving into the construction process, it's crucial to understand the basic components of an electric guitar. At its core, an electric guitar consists of the body, neck, pickups, and electronics. Each part plays a significant role in the guitar's sound and playability, so having a foundational knowledge will help you make informed decisions during the build.
The guitar is a miniature orchestra in itself.
Think of the guitar body as the resonating chamber, similar to how a violin's body amplifies its sound. The pickups are like the microphone that captures the vibrations of the strings, translating them into electrical signals. Understanding how these parts interact will set the groundwork for your project.
Additionally, familiarize yourself with different guitar types and their unique features. Whether you lean towards a Stratocaster or a Les Paul, knowing the nuances of each style can help you tailor your build to your personal sound preferences.
Gathering Tools and Materials for Your Build
Building an electric guitar requires a specific set of tools and materials. Start with the basics, like a saw, drill, and sandpaper, as well as more specialized tools like a soldering iron and fret files. Each tool serves a purpose, whether it's shaping the body or ensuring that the frets are properly installed.
As for materials, you'll need wood for the body and neck—commonly used types include mahogany, maple, and alder. Don’t forget about the hardware components, such as the bridge, tuning machines, and pickups. Having everything on hand before you start will streamline the process and help you avoid interruptions.
Know Your Guitar's Components
Understanding the parts of an electric guitar, such as the body, neck, and pickups, is essential for informed building.
Consider investing in high-quality components, as they can significantly impact the final sound and playability of your guitar. Quality materials can be the difference between a guitar that feels good to play and one that doesn’t.
Designing Your Guitar: Shape and Style Choices
This stage is where your creativity shines! Designing your guitar isn’t just about the technical aspects; it’s also about personal expression. Sketch out your ideal shape and think about the style—do you want a classic look or something more modern? Laying out your ideas visually can help you make critical decisions.
Every guitar I own gets played. That’s the only reason I have them.
Consider the ergonomic aspects of your design. How will the guitar feel when you play it? Should it have a contoured body for comfort? These questions will guide you in creating a design that is not only visually appealing but also functional.
Don’t hesitate to look at existing models for inspiration. There’s a wealth of designs out there, and sometimes blending features from different guitars can result in something uniquely yours.
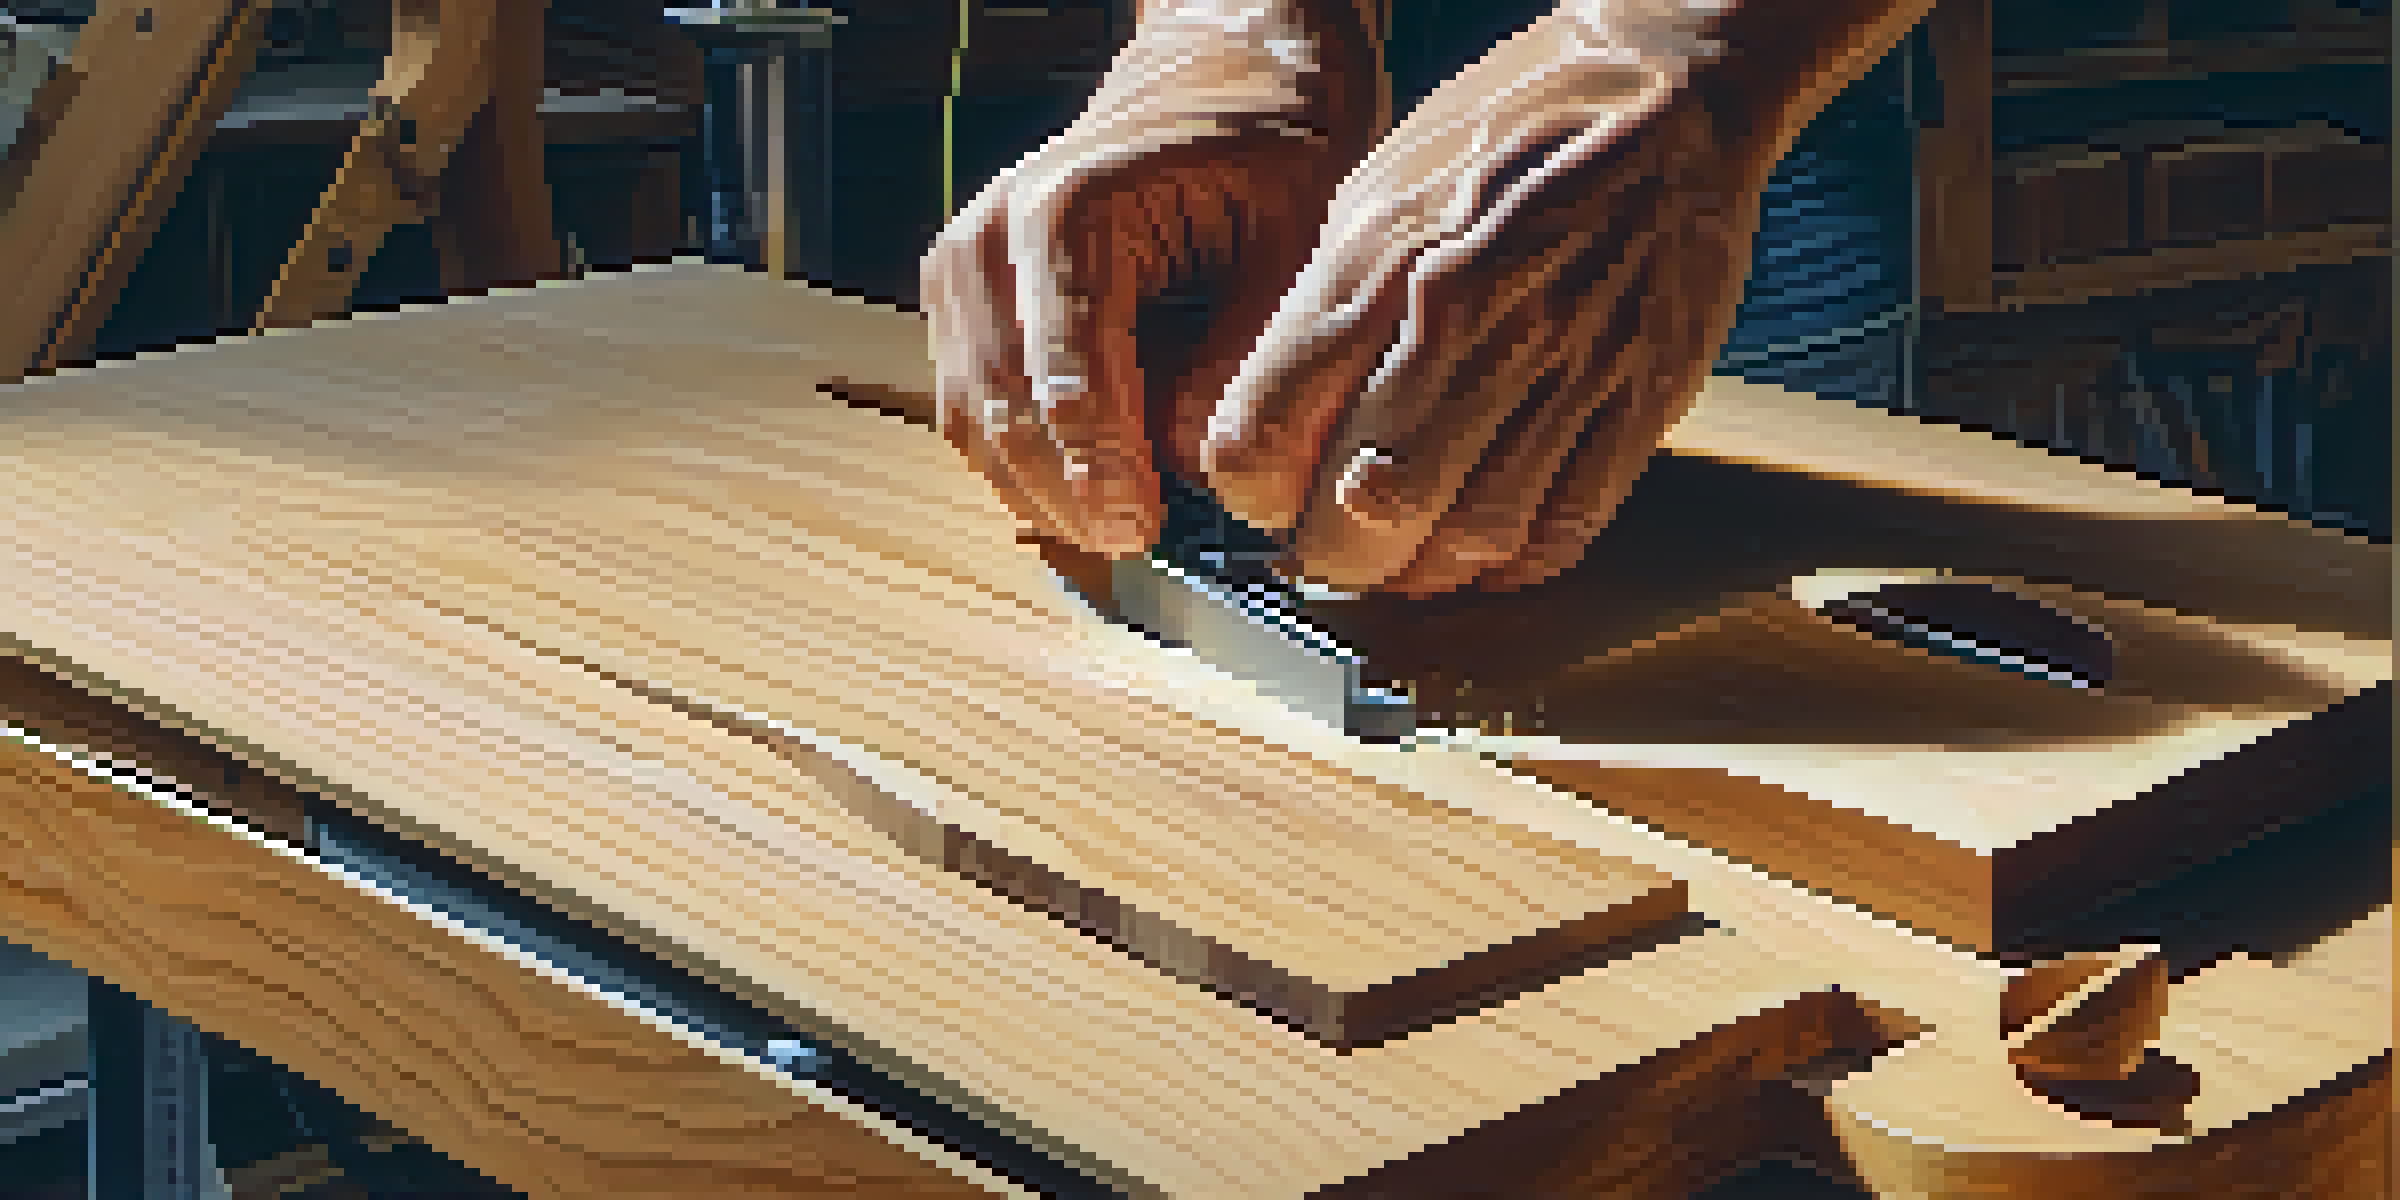
Shaping the Body: Cutting and Sanding Techniques
Once you have your design ready, it's time to shape the body of the guitar. Using a jigsaw or band saw, carefully cut out the body shape from your chosen wood. Take your time with this step—precision is key to ensuring that everything fits together smoothly later on.
After cutting, sanding the edges and surfaces will help achieve a polished look. Start with coarse sandpaper and gradually move to finer grits to create a smooth finish. This step is crucial, as a well-sanded body will feel great to hold and will enhance the overall aesthetic.
Gather Essential Tools and Materials
Having the right tools and high-quality materials on hand streamlines the guitar-building process and enhances playability.
Remember, patience is essential here. Rushing through cutting and sanding can lead to mistakes that are difficult to fix later, so take your time to get it just right.
Constructing the Neck: Fretboard and Truss Rod
The neck is where the magic happens, so it’s vital to construct it with care. Start by shaping the neck wood and cutting out the fretboard. A well-shaped neck will not only improve playability but also affect the guitar's overall tone.
Don’t forget to install the truss rod, which helps adjust the neck's curvature. This adjustment is essential for maintaining proper action and preventing fret buzz. Properly aligning the truss rod before attaching the fretboard ensures that your guitar remains playable over time.
As you add frets to the fretboard, take your time to space them correctly. A good rule of thumb is to use a fret calculator or template to ensure accuracy. Every little detail counts, and a precise fret placement will lead to a more enjoyable playing experience.
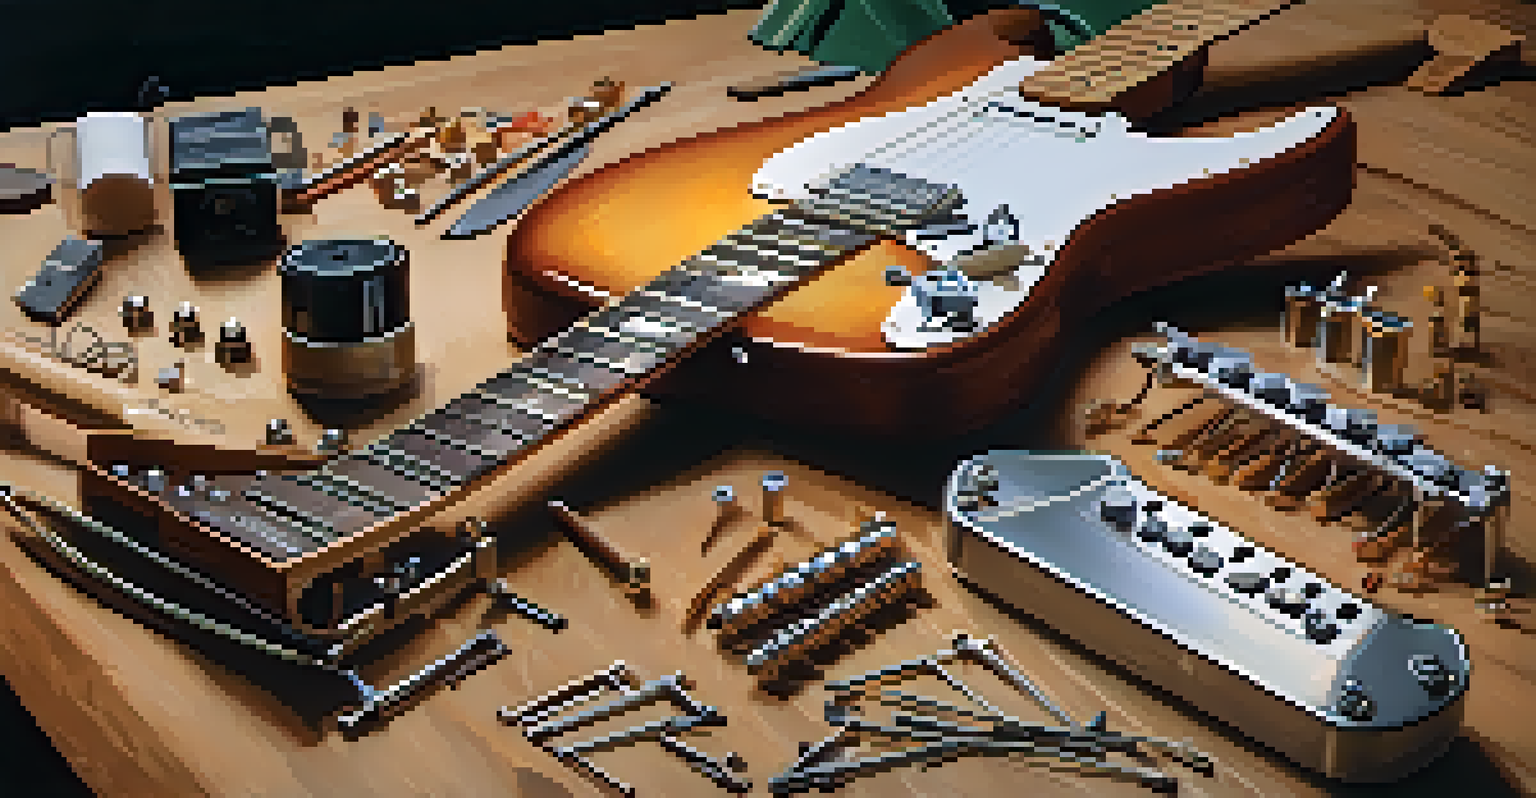
Electronics: Installing Pickups and Wiring
Now it's time to tackle the electronics that bring your guitar to life. This involves installing the pickups, which are crucial for capturing the sound of the vibrating strings. Each type of pickup has its unique tonal characteristics, so select the ones that best fit your desired sound.
When it comes to wiring, it's essential to follow a schematic to avoid confusion. Properly soldering the connections will ensure that your guitar's signal flows smoothly without any unwanted noise. If you're new to soldering, practice on some scrap wire first to build your confidence.
Focus on Design and Precision
Careful attention to design, cutting, and assembly will result in a guitar that is both visually appealing and enjoyable to play.
Lastly, once everything is wired and secured, double-check your connections before final assembly. A clean and organized wiring job will not only make for a better-sounding guitar but also help with troubleshooting in the future.
Final Assembly: Putting Your Guitar Together
With all the components ready, it’s time for final assembly! Start by attaching the neck to the body, ensuring that everything aligns correctly. This step is crucial as a misaligned neck can lead to playability issues down the line.
Next, install the bridge, tuning machines, and any other hardware components. Make sure everything is secure, as loose parts can hinder your guitar's performance. This is also a good time to do a thorough check of all your wiring to confirm that everything is in place.
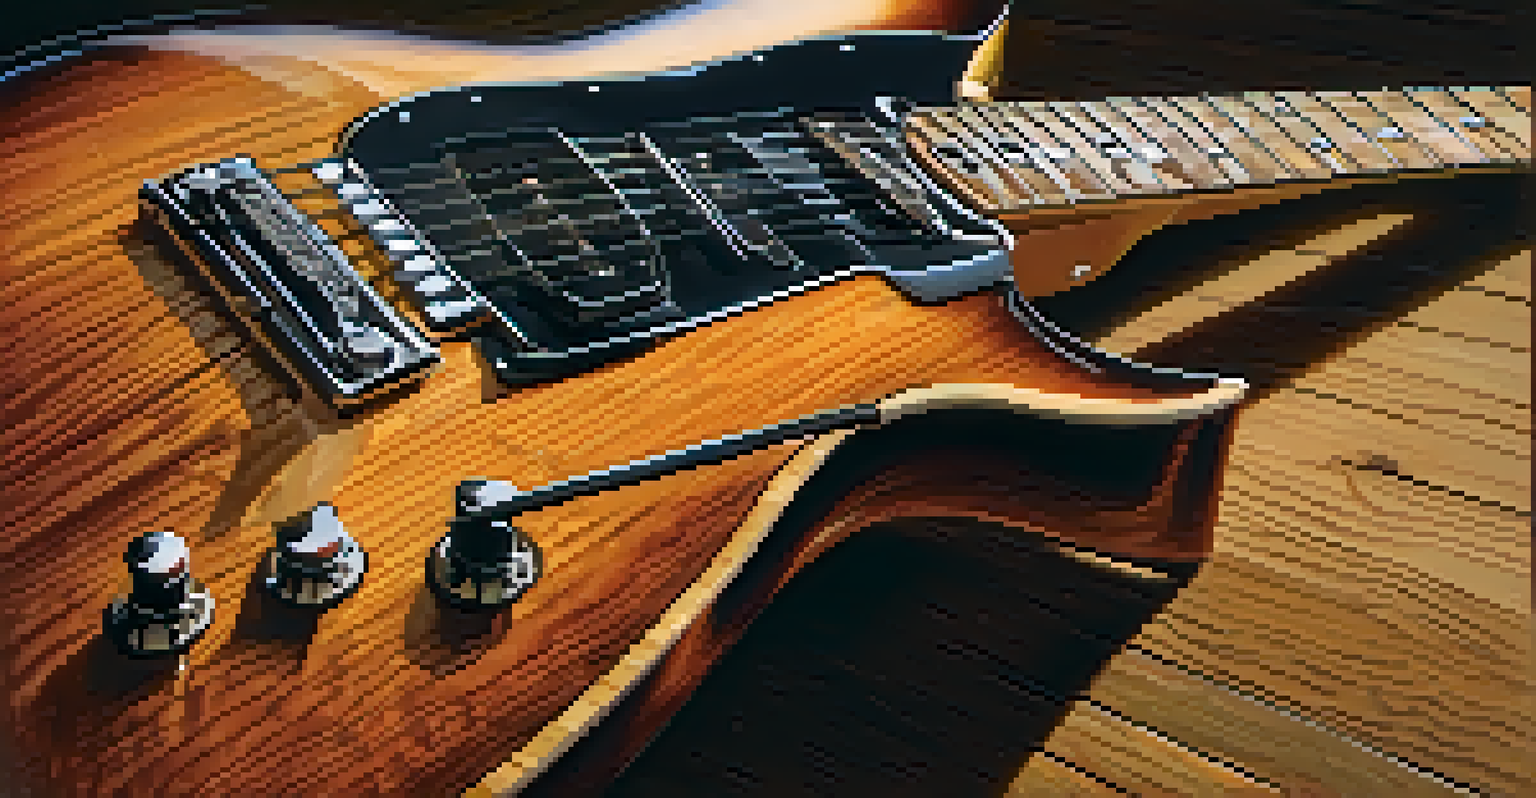
Finally, give your guitar a full setup, adjusting the action, intonation, and pickup height. This final tweaking ensures that your guitar not only looks great but also sounds amazing when you plug it in and start playing.