Essential Guitar Recording Techniques for Studio Sessions
Choosing the Right Guitar for Your Session
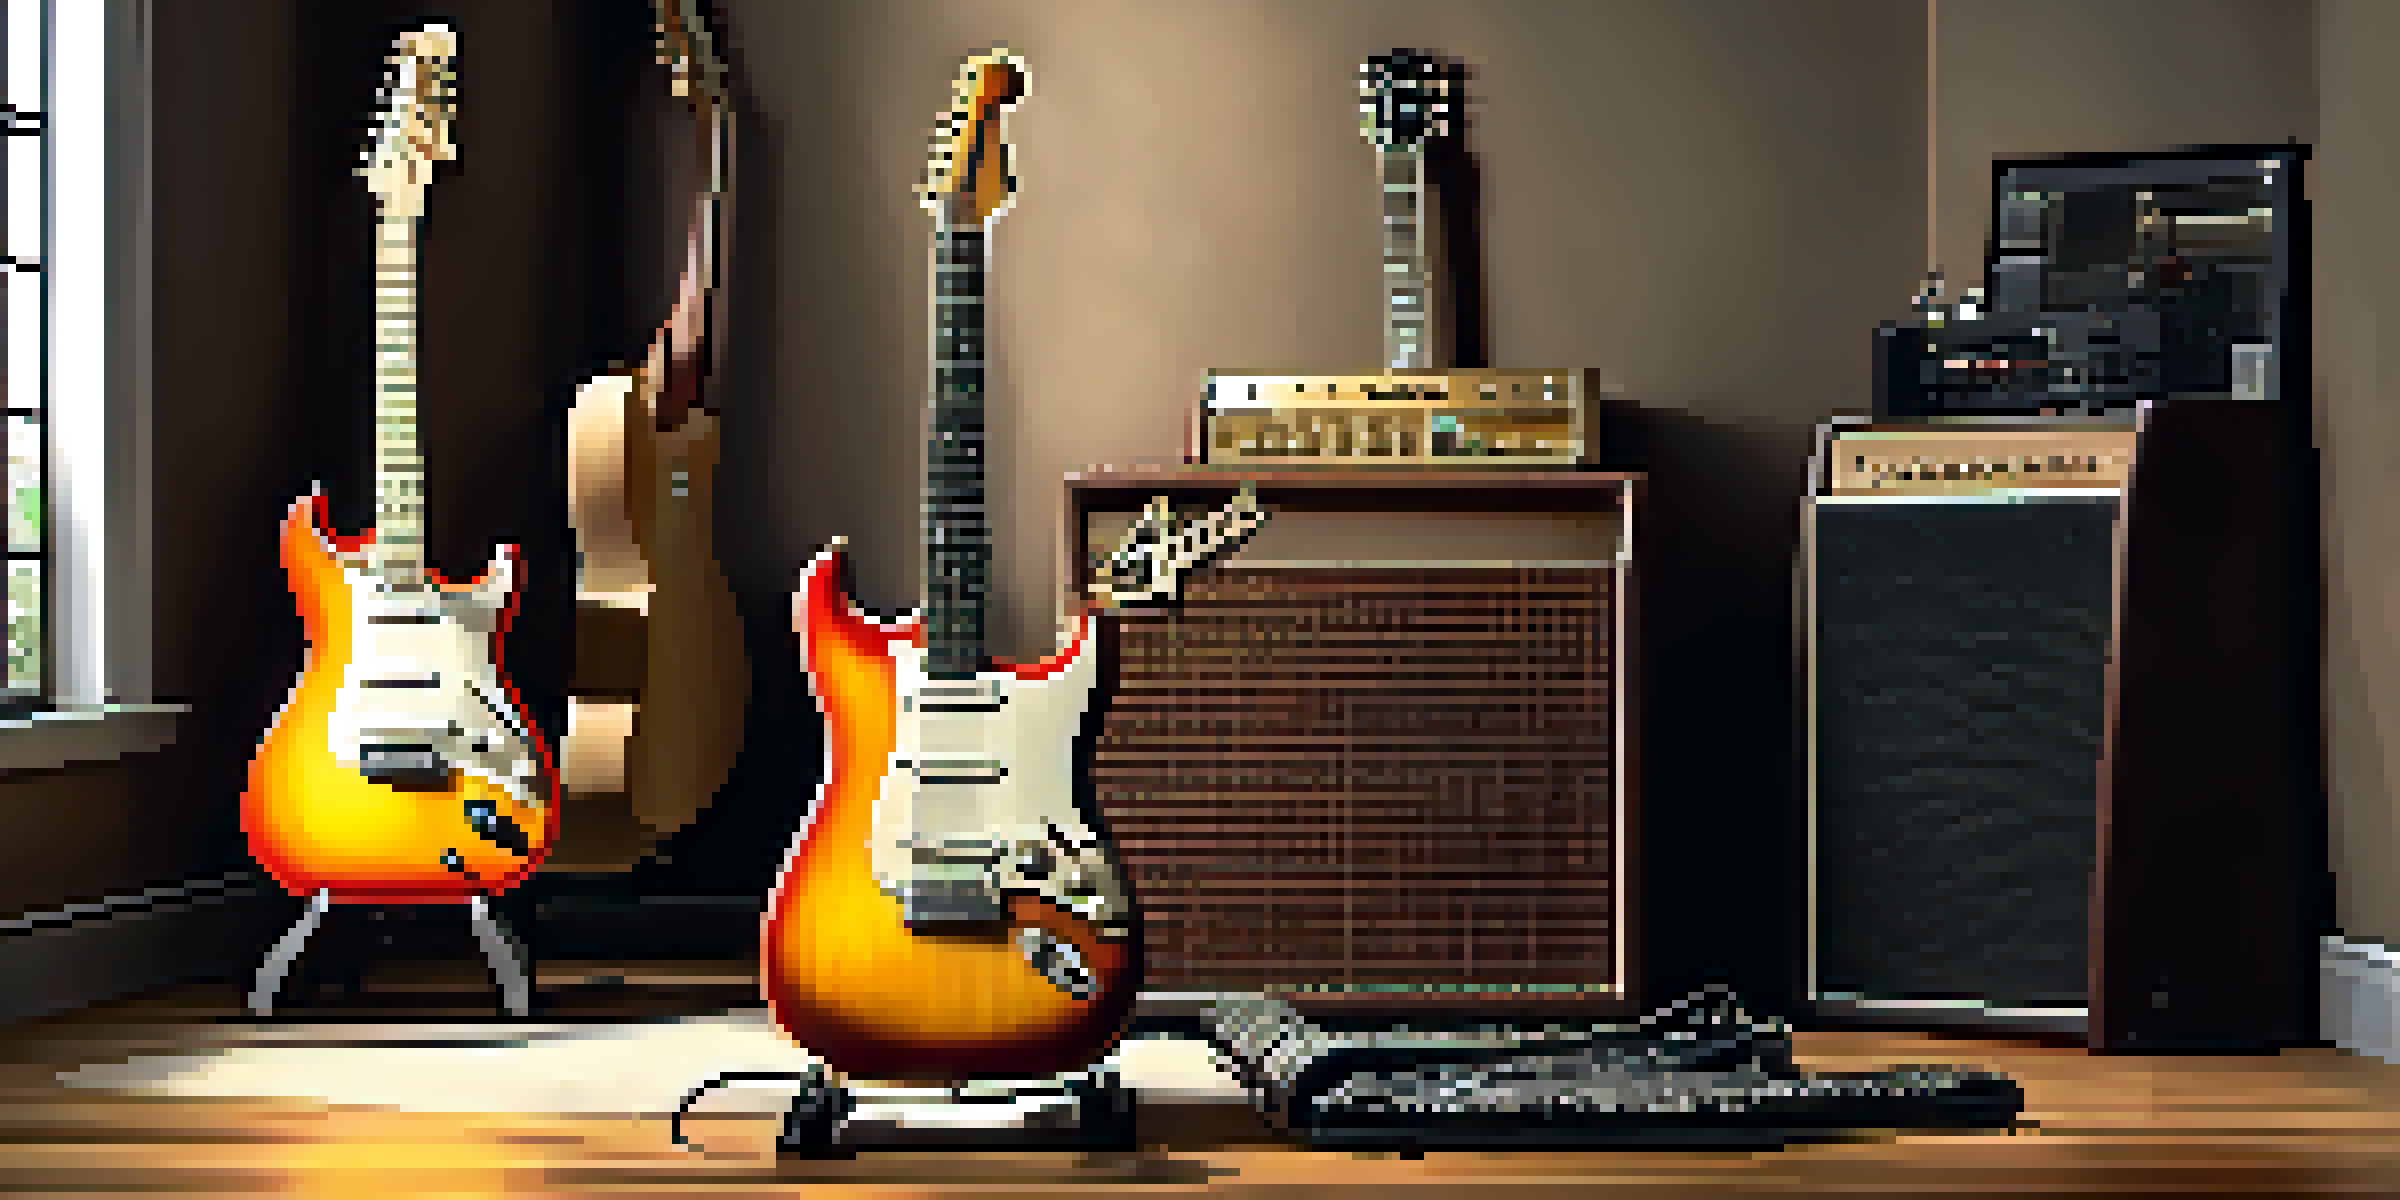
The foundation of any great recording starts with the guitar itself. Selecting the right instrument can dramatically impact your sound, whether you're going for a warm acoustic vibe or a punchy electric tone. Think about the genre you're working in; for example, a bright Stratocaster may shine in pop music, while a thick Les Paul might be ideal for rock.
The guitar is a miniature orchestra in itself.
Also, consider the condition of your guitar. A well-maintained instrument not only plays better but also records more clearly. Make sure to check the strings, intonation, and overall setup before heading into the studio. Remember, a little preparation goes a long way!
Lastly, don’t hesitate to experiment with different guitars during the session. Sometimes, a guitar you wouldn’t normally use could offer that unique sound you didn’t know you were looking for.
Microphone Placement: Finding the Sweet Spot
Microphone placement is an art in itself and can significantly alter the sound of your guitar recordings. For electric guitars, placing a dynamic microphone close to the speaker cone can capture a punchy, aggressive tone, while positioning it further away may yield a more ambient sound. Each placement tells its own story.

With acoustic guitars, aim to capture the resonance of the body and the clarity of the strings. A common technique is to place a condenser microphone about 12 inches from the sound hole at a slight angle. This positioning helps balance the warmth of the body with the brightness of the strings.
Choose the Right Guitar
Selecting the appropriate guitar for your music genre can significantly enhance your recording's overall sound.
Don't hesitate to experiment with multiple microphones and placements to discover a unique sound. Combining different mic types and positions can create a richer, more textured recording that stands out.
Utilizing Effects for Enhanced Guitar Tones
Effects can elevate your guitar recordings to an entirely new level. Whether you’re using pedals or software plugins, the right effects can add depth and character to your sound. For instance, a touch of reverb can create a spacious feel, while a bit of distortion can add grit to your electric guitar.
Music is the shorthand of emotion.
However, moderation is key. Too much effect can muddy your mix, making it difficult to distinguish each note. It's often best to record with a clean tone and add effects during mixing, allowing for greater control over the final sound.
Lastly, don't forget to explore different settings on your effects. Sometimes, dialing in an unconventional setting can yield surprising results that may inspire your creativity.
Setting the Right Levels During Recording
Proper gain staging is crucial in the recording process. You want to ensure that your guitar signal is strong enough to capture all the nuances but not so loud that it causes distortion. Aim for levels that peak around -6dB to -3dB on your interface or digital audio workstation (DAW).
Monitoring your levels while playing can help you catch any potential issues before they become a problem. If you find yourself constantly adjusting your playing to match the volume, it may be time to reevaluate your setup or technique.
Master Microphone Placement
The positioning of your microphones can greatly influence the tone and clarity of your guitar recordings.
Remember, a clean recording will save you time during mixing and ensure that you capture the full spectrum of your guitar's tone.
Layering Guitars for a Fuller Sound
Layering guitars is a technique used by many producers to create a fuller, richer sound. By recording multiple takes of the same part, you can achieve a lush, dynamic texture that adds depth to your track. Just be mindful to keep the performances tight and in sync.
Additionally, consider using different guitars or tones for each layer. For instance, you might record a crunchy rhythm part on one guitar and a clean lead on another. This contrast can keep the listener engaged and add variety to your arrangement.
Finally, during mixing, you can pan these layers left and right to create a wide stereo image, making the track feel even more expansive.
Using Direct Input (DI) for Clarity
Direct Input (DI) is an often-overlooked method for recording guitars, especially electric ones. By connecting your guitar directly to your audio interface, you can capture a clean signal that’s free from the coloration of microphones and amps. This can be particularly useful for achieving a sharp, clear sound.
One advantage of using DI is that it allows you to reamp your guitar later. This means you can experiment with different amps and effects after the initial recording, giving you more flexibility in the mixing phase.
Edit for a Polished Sound
Editing your guitar tracks carefully can help remove imperfections and elevate the quality of your final mix.
Just keep in mind that while DI recordings can be clean, they may lack some of the character that comes from mic'ing an amp. A common approach is to combine both methods for a well-rounded sound.
The Importance of Monitoring in Real-Time
Monitoring your guitar recordings in real-time is crucial for capturing the best performance possible. Using headphones while tracking can help you hear your playing clearly without the interference of other instruments. This allows you to focus on your tone and dynamics, making adjustments as needed.
In addition to regular headphones, consider using in-ear monitors (IEMs) for a more isolated listening experience. They can help block out ambient noise, allowing you to concentrate on your playing.

Remember, the goal is to create an environment where you feel comfortable and confident, which will ultimately lead to a better recording.
Editing Techniques to Polish Your Guitar Tracks
Once you've recorded your guitar tracks, editing is where the magic happens. This process can involve trimming unwanted noise, adjusting timing, and cleaning up any mistakes. A little bit of editing can go a long way in making your tracks sound polished and professional.
Consider using software tools to correct pitch and timing issues, but use them sparingly to maintain the natural feel of your performance. Over-editing can strip away the character of your playing, so find a balance that works for your style.
Choose the Right Guitar
Selecting the appropriate guitar for your genre and ensuring it's well-maintained can greatly enhance your recording quality.
Finally, don’t forget to take breaks while editing! Fresh ears can catch things you might otherwise miss, ensuring your final mix is as strong as possible.